Introduction
When provisioning a new Laravel Forge server that requires a database, you can choose between installing an app server or a dedicated database server. The Forge dashboard provides comprehensive tools for managing databases, users, and permissions across your infrastructure.Creating servers with databases
During server creation, you can select from several supported database servers:- MySQL (8.0, 8.4, 9.x)
- MariaDB (10.11, 11.4)
- PostgreSQL (13, 14, 15, 16, 17, 18)
forge database and user with a securely generated password. Both the database and root passwords are displayed upon server creation for your reference.
MySQL 9.x is an Innovation release, designed for developers and teams who want access to the latest MySQL features and improvements. Innovation releases are production-ready, but each version is only supported until the next Innovation release ships.Laravel VPS servers are limited to the latest MySQL LTS and PostgreSQL versions only.
Installing databases later
If you need to add database functionality to an existing server, you can install one through the server’s “Databases” management tab. Once installed, you’ll have full database management capabilities through the Laravel Forge interface.Managing database passwords
You can reset bothroot and forge database user passwords using the password reset feature in Laravel Forge’s “Databases” management tab.
Connecting to databases via database clients
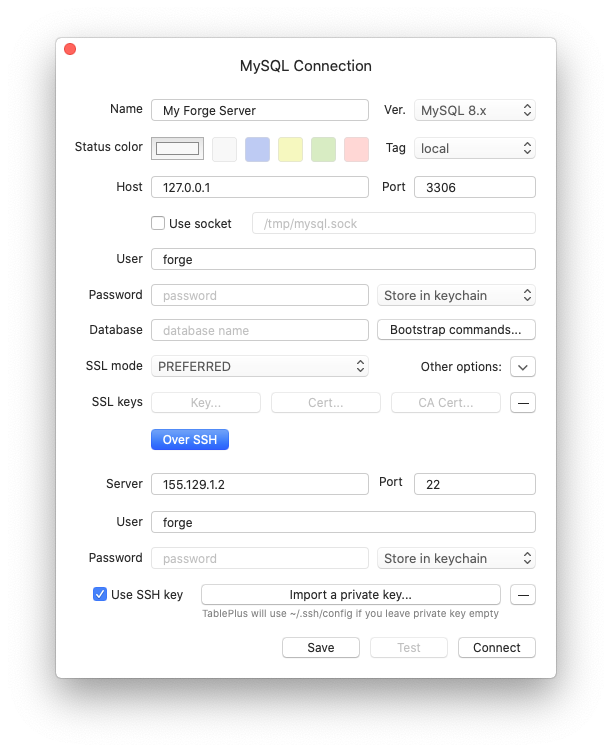
Database connections require SSH key authentication by default and don’t support password-only access. When using GUI database clients to connect to your Laravel Forge database, you’ll need SSH authentication with your private SSH key. For example, when configuring TablePlus:
Using database connection URLs
Some clients like TablePlus support connection URLs for simplified setup. Laravel Forge automatically generates these URLs for you, though you’ll need to enter your password manually since it’s not included in the URL for security purposes. Forge also provides a convenient button to launch your preferred database client directly.Connecting to external databases
You can connect your application to a database hosted on another Laravel Forge server using Laravel Forge’s server network feature. When both servers meet the network requirements, follow these steps:- Configure server network access:
- Navigate to your application server’s “Network” settings
- Enable the connection to your database server under the “Server Network” section
- Update application configuration:
- Access your site’s environment page
- Set the database host to the external server’s private IP address
- Update database credentials to match the external database
Managing databases
Laravel Forge provides advanced database management capabilities for MySQL, MariaDB, and PostgreSQL servers.Creating databases
Create new databases through the server’s “Storage” > “Database” tab. You only need to provide the database name—theforge user automatically receives access permissions.
Syncing databases
While we recommend managing databases through Laravel Forge for consistency, you can sync externally created databases using the “Sync Databases” button. Note that system-reserved database names are excluded from syncing:mysql,information_schema,performance_schema,syspostgres,template0,template1